Since moving to France in May, I was waiting to settle down with an apartment search and all the relocation headache. Finally, things started to get in shape and my health is improved (from the surgery). So, I resumed with my online course planning and filming tasks which I left off long time ago. In this “Fashion Design & Illustration” course, I plan to teach the class using mainly a tradition marker colors method which is widely used in fashion schools around the world. But I will add Procreate techniques to substitute the materials with brushes and color palettes so that Procreate users can follow along with me during the class.
This blog post is not at all sponsored by anyone. It’s my honest opinion and experience with markers that I would like to share. There are some product links and discount code in this post that I may get some small store credit or a small commission for.
Some marker brands that I previously used.
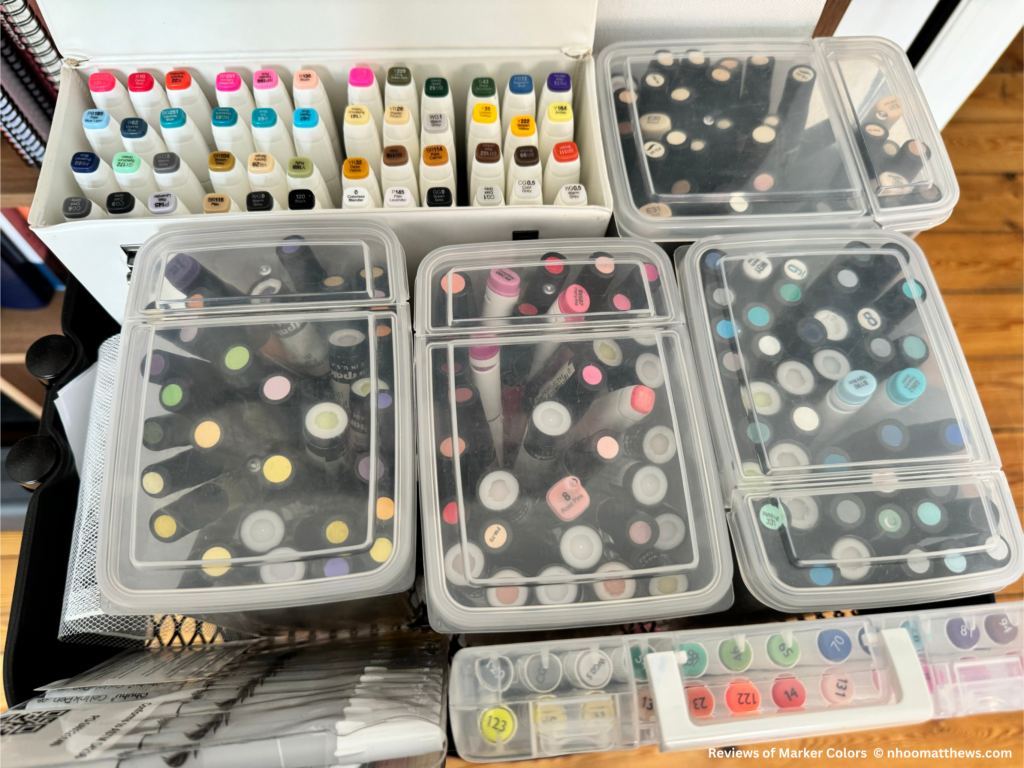
I have been using marker colors since 2003 which many of them are still with me. I kept them in closed plastic boxes to prevent alcohol ink to evaporate. The majority of them are still in great condition and stay in true colors! The main brand I used back then was Prismacolor. I got them from Pearl Paint (sadly no longer there) on Canal street in Chinatown, New York. With student discount, I think I paid roughly about $1.00 per marker.
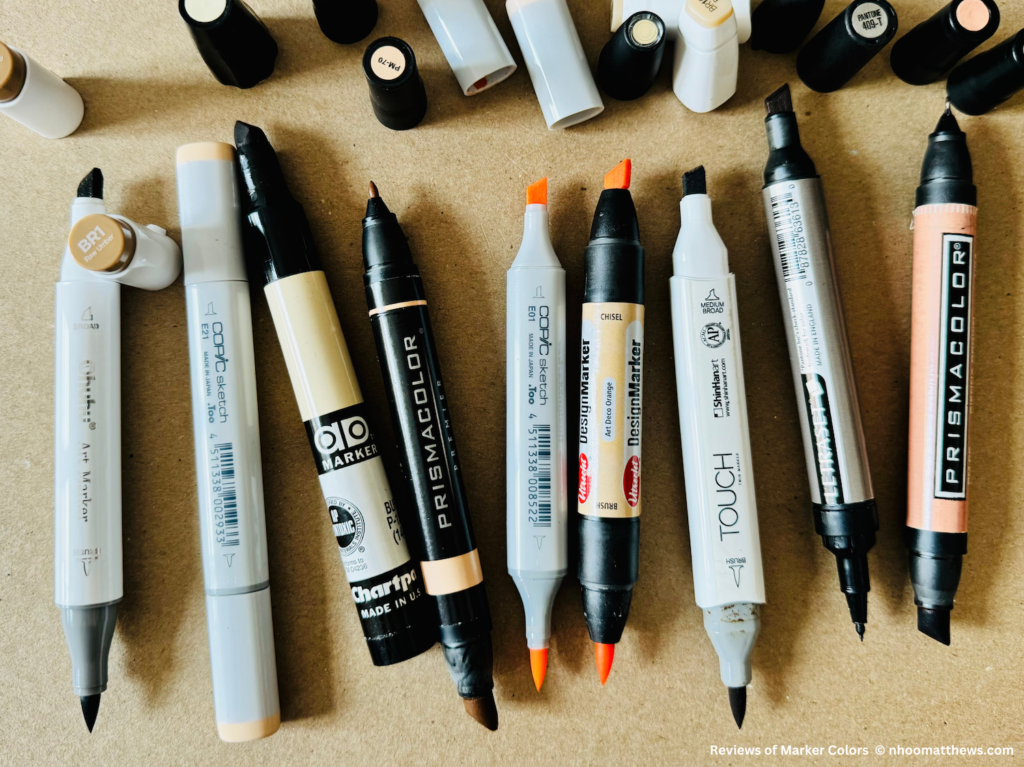
Another brand that I had used was the Tri-Nib Chartpak AD markers. These juicy and generous ink markers were favorited by the legendary Prof. Stipelman from F.I.T. and he was the one who introduced this to me. Though, the smell is extremely strong but this marker works great on large area when you need it (great blend!). Both brands are easy to find in The U.S. The price range is quite ok for those who live there. I believe “Blick Art Materials” shops offered student discount and membership discount, when I last visited in NYC.
In 2014, when I taught fashion design classes in Bangkok, I had a couple of Copic markers which I love! The downside of it was the price was quite high, plus, I couldn’t try the colors in stores (when I lived in Bangkok). So, I didn’t want to spend a fortune on a risk of having colors that I didn’t expect to get.
Another brand I used was Touch Shinhan Markers. I had an opportunity to try out all the Touch Twin Brush Markers with a lovely assistance and support from Lamune shop in Bangkok. This amazing stationary shop asked me to create a marker collection for Fashion Design students because there were many people looked for markers for the subject. If you are in Bangkok, you can reach out to Lamune and ask them to put together a set of 48 Fashion Markers that I curated. I did some skin tone colors in fashion figures for Lamune as well. Touch has beautiful colors. The nibs are so elegant and easy to use. Their marker pads is one of the best I’ve used. If you want to get the most vibrant colors, use Touch markers on Touch marker pads! You won’t be disappointed.
I believe the price range of Copic and Touch Markers are quite good in Asia. If you live in Japan, Copic is definitely the way to go. Touch is a South Korean brand, so the best price you will find is probably in the country.
Shopping for markers for my online class.
Over the past couple of years, I saw Ohuhu markers has risen on the market. Their marketing campaign is so effective on Instagram and Youtube. What interests me about Ohuhu is the wide range of products they offer with affordable prices, and very accessible by Ohuhu website and Amazon online shopping worldwide. That being said, this brand probably worth introducing to my students who will take my online course in the future.
I looked up reviews on Youtube for which sets of markers I should buy. I wanted to start with their skin tone colors set because that is probably the core of fashion illustration. I decided to get the 36 skin tone color set (they have 24 skin tone colors set as well.) to make swatches of fashion figures and hair colors. I purchased from the Ohuhu EU website because I live in France but you can choose the warehouse locations on the same website as well. How convenient! The product was shipped from Germany to France which took about 4-5 days.
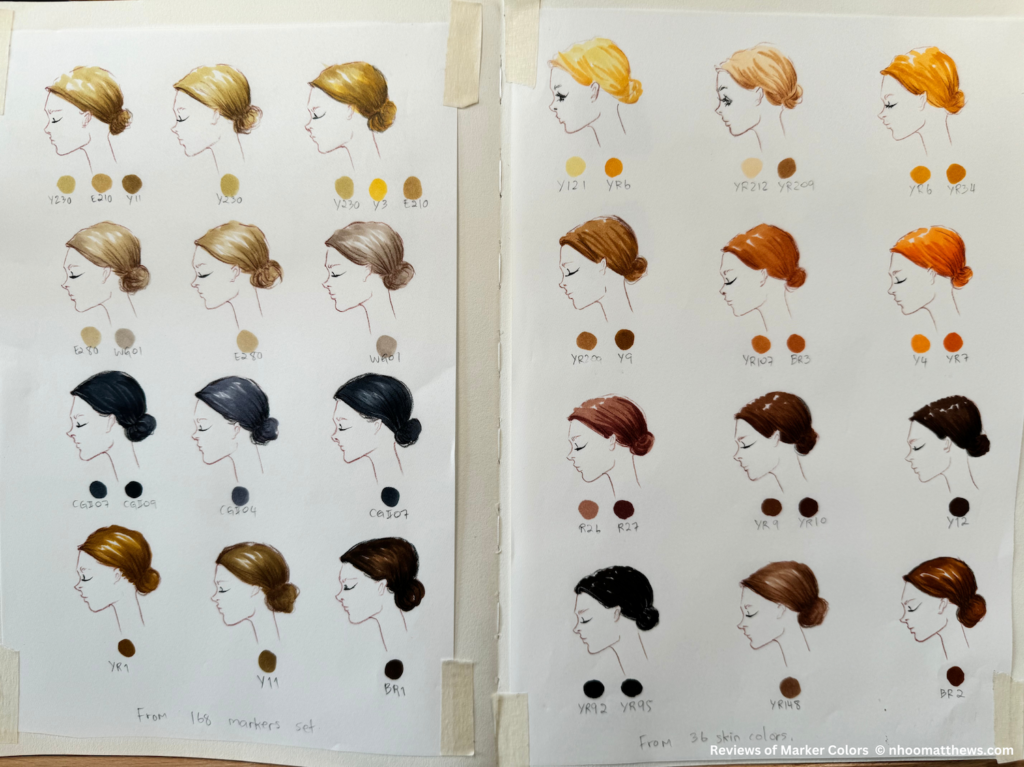
I began swatching all the colors on Ohuhu swatch card and on my favorite marker paper (Bienfang 360). I recommend that you do this because colors do appear differently on different paper. Always test out the colors you are going to use on the paper that you actually are going to use so there is no surprise later. When I had all the swatched colors in front of me, I then started mix and match the possible colors for skin tones and hair. The colors are quite nice but there aren’t any mid-tone skin colors and there aren’t any good blond shades! I was quite disappointed. Amongst 36 colors, there are many brown and orange shades which I don’t actually use them all. My guess is that Ohuhu is popular with Manga and comic artists so the colors from this set seems very saturated. I wish I could make a set of skin tone colors for Fashion Design for them!
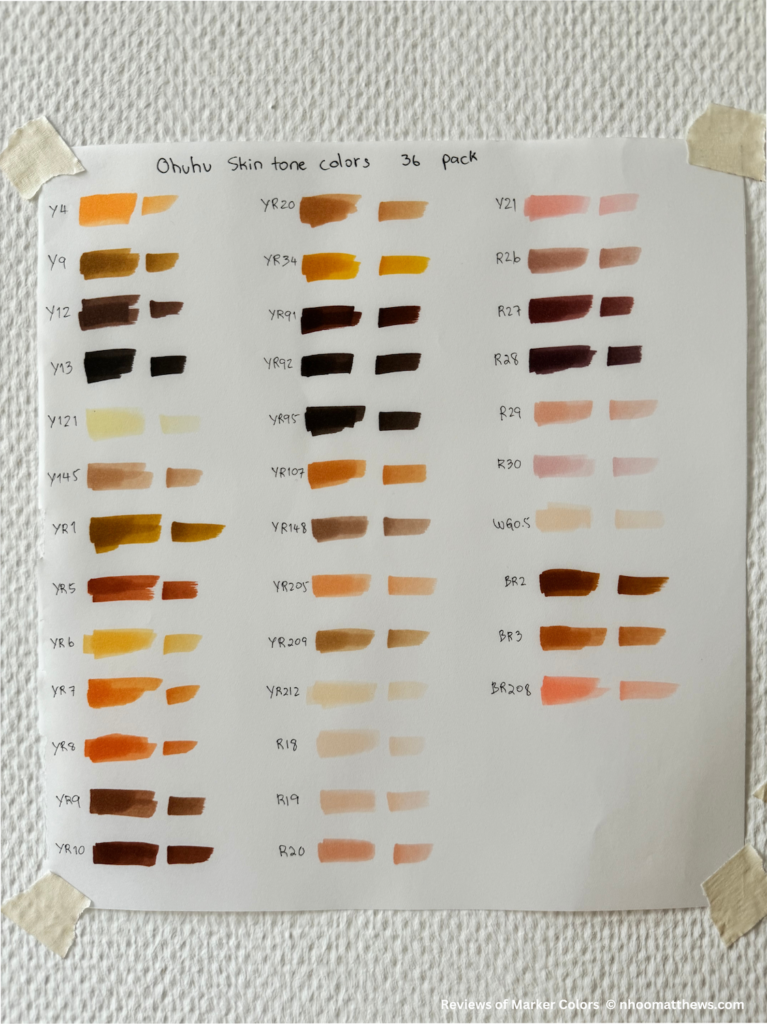
After testing and seeing the results of the 36 Skin Tone Marker Colors, I went shopping again. This time, my goal was to get a set of markers that is no more than 100 colors. I don’t think I will ever gonna use them all. On Ohuhu website and on their Amazon shops, the swatch color samples are really not helping much. The colors are too light. I found a couple of Youtube reviews that had better color swatches. This helped me make a decision easier. Anyway, seeing available options, I thought I was going to get either the 104 or 120 colors set. However, there aren’t any colors that I think would work for mid-tone skin colors nor beautiful blond hair shades.
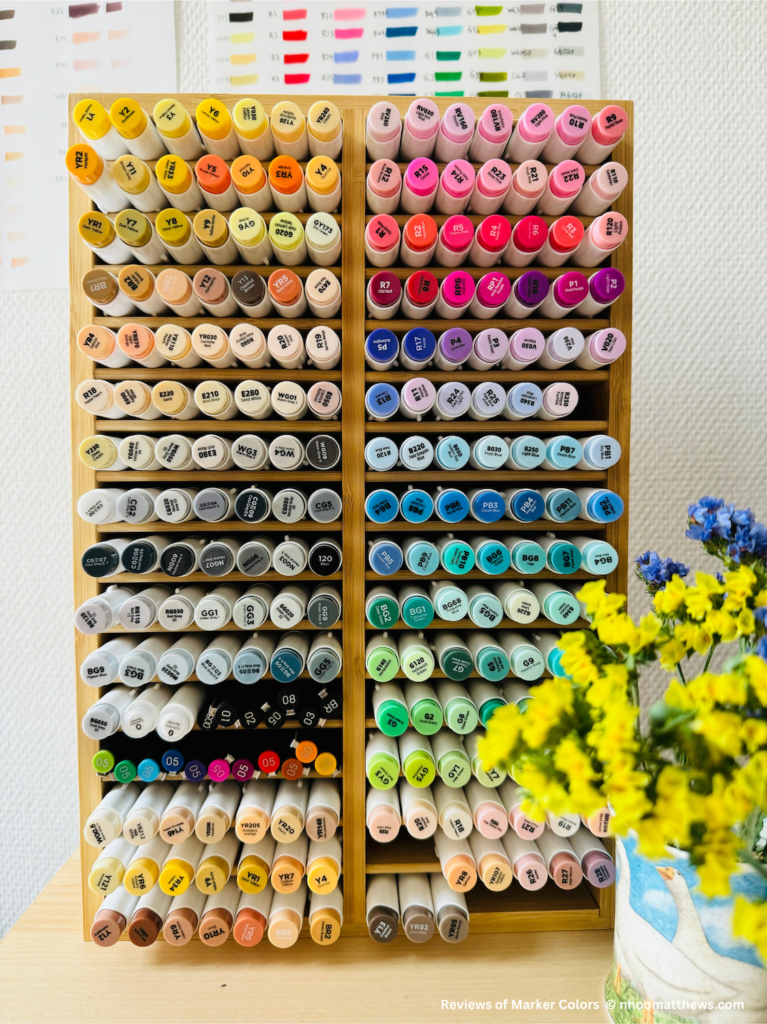
Ohuhu 168 marker colors
I ended up with the 168 colors set. This set has an E color group (I think it means Earth tone) which has some similar colors to the Copic ones I have been using for skin colors. It also has so many beautiful grey shades range from light, medium, and dark which is great! I don’t need to have all grey 1-9. In fashion illustration, I use grey only in 3 weights: 0.5-1, 4-5, and then 8-9. So, this covers it! They do have many shades of red, blue and green. However, I was hoping that this set offers more brown shades than it actually does.
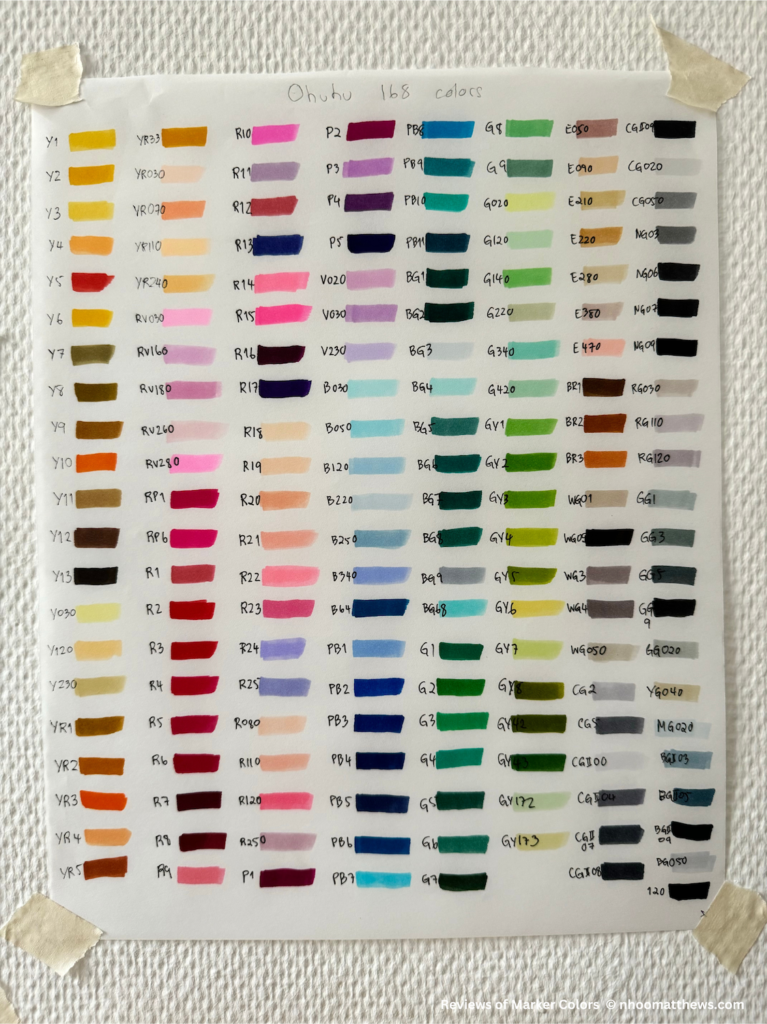
Just for fun, I filmed the unboxing and organizing parts for social media. But this went on for 2-3 days including the making of sample sketches! Having 168 marker colors is quite overwhelming for me. Take a look at how I managed the set for my work flow in the video below. I hope this helps if you are getting one. It’s a great way to get to know all the colors. Some colors are so similar to each other. Some colors have strange names which are quite misleading, i.e. BR208 peachy color was name “Black Brown” 😂.
I’m quite happy with the additional skin and hair colors that I was hoping for. I was able to create mid-tone skin colors and some sophisticated blond and ash blond hair colors with this 168 colors set. Plus, you can create most skin/hair colors that I used from the 36 Skin Tone Colors set with the 168 colors as well.
Here is the video of unboxing. I made it an ASMR for social media but you can fast forward to the end for the skin and hair color swatching.
Overall, Ohuhu markers are pretty great considered the price that is so affordable. The colors are very pretty and vibrant. I use their “Honolulu” collection which has the Brush and Chisel nibs. One slight minor point, the Brush nib could be better. It’s a little too stiff in my opinion, compared to other brands I have used which has nice springing effect when it touches paper. I had a better coloring control with that.
Friends and Family 10% discount and Amazon product links.
In case you decide that you want to get the Ohuhu marker pack, you can use the 10% off discount code with $70 minimum purchase on the Ohuhu website. Follow this link for the code. In return, I’ll get some little store credit by sharing this with you. Maybe I’ll use it to buy their refills. 😆
If you are shopping on Amazon, here are the associated links which I will earn small commission when you buy from.
Ohuhu 168 marker colors set 👩🏻🎨
Ohuhu 36 skin tone colors set 👩🏻🦰
What’s the best practice to buy markers?
If you have an access to art supply stores, I recommend that you buy individual marker colors that you need. You should be able to test the colors at the premises before making a decision to buy. If the marker brands you use offer ink refills and brush nibs, that is a big plus! There will be some colors that you use all the time. You can buy refills and nibs to replace the ones you used. This saves you a lot of money in the long run.
Buy local brands. As I mentioned earlier in this blog post, prices of the products depend on where they are made and sold. Copic and Touch are cheaper in Asia than in Europe and North America. Prismacolor, Chartpak are cheaper in North America than anywhere else. Winsor & Newton markers are also great (they used to be Letraset brand but got taken over by WN.) and probably cheapest to buy in Europe than anywhere else.
Ohuhu is relatively new to me. I can’t guarantee the long lasting quality of the products like the ones I have used such as Prismacolor and Chartpak. One thing you need to consider is that all marker colors are not lightfastness. It will fade when the artwork get exposed to sunlight or any light in general. I keep my artwork in portfolio books so they stay away from light. The colors are pretty much the same as they were 20 years ago. If you plan to display your artwork on walls or sell them as original art pieces, this is something for you to consider. Watch this great Youtube video from Thaneeya about lightfastness and markers.
In conclusion, shop around and compare prices is what I would do. If getting a set of Ohuhu markers seems attractive to you because of the price and you are a beginner, definitely do it. Before you go ahead and buy 200-300 marker colors, ask yourself if you will do art all the time or not? The video above should remind you that sometimes some marker colors will be degraded over a long period of time due to different factors such as how you store them, amount of heat, humidity, light exposure in the environment.
I hope this blog post helps you in some way. If you like it, please share them with anyone you think will find it helpful.
Happy creating!
Nhoo 🤩
If you want to be in touch with my updates and my future online classes, please subscribe for email notification (promise not to spam your mailbox!).